Library Programs

Imagination Station: Movie Theater

Westerville Library’s youth department includes a pretend play area–our Imagination Station. Each month, a different youth librarian picks a theme and plans a play area designed for ages 3-6.

There are no strict guidelines for this space, but generally we try to:

  • Pick a theme that appeals to children
  • Keep all activities safe for all ages
  • Make clean-up and maintenance manageable for staff
  • Create materials and activities that are durable
  • Incorporate early literacy activities

In August 2018, I took over the Imagination Station, creating a play space I had been looking forward to for over a year: a movie theater.

Explore another Imagination Station – Mission Control themed – in this post.

Pretend Play: Movie Theater

While some of my Imagination Stations include a ton of obvious early literacy activities, this one focused almost entirely on pretend play. This appealed to all ages, with evening staff occasionally having to distract our older teens from playing at the Imagination Station so some of the younger toddlers could still enjoy the space. Pretend play has a ton of benefits for all ages, including social-emotional skills, language development, vocabulary building, problem solving skills, and more.

To create the “movie theater” experience, my Imagination Station had a few key areas:

  • Ticket Booth
  • Concession Stand (with popcorn machine)
  • Movie Posters
  • Showtime Board

Ticket Booth

The ticket booth included our department cash register, stocked with fake money. There was also a bin of tickets with space for cashiers to write down the name of the movie and a “tear-off” side so the tickets could be redeemed to see a movie. We had 3D glasses too–you have to be prepared for those special (and more expensive) movie showings!

Concession Stand

The concession stand included all of the classic movie theater favorites including:

  • Nachos (yellow felt circles — purchased pre-cut from Etsy for less than $5)
  • “Cheese” cups (condiment cups with yellow circles hot glued to the bottom
  • Drink Cups
  • Candy (purchased at Dollar Tree, emptied of candy, stuffed with stuffing, and wrapped in packing tape)
  • Popcorn

The popcorn machine was the favorite item of our visitors, but the least favorite item of staff. The popcorn box was a Donatos pizza delivery box from a past lock-in (when we had 20+ pizzas delivered). Holes were cut in each side, and the largest three holes were covered in clear cellophane. Popcorn could be scooped out of the front.

The individual popcorn kernels were crumpled squares of roughly 2″ x 2″ tissue paper. The kids loved the texture and enjoyed unraveling and re-rolling popcorn kernels.

Staff did not enjoy the clean up. I am still apologizing for the popcorn of 2018.

Movie Posters

The movie posters were one of my personal favorite spaces in this Imagination Station. Our awesome marketing department printed the larger “Coming Soon” and “Now Playing” signs on our library banner printer. I laminated those and attached 11″ x 17″ page protectors with a ton of packing tape, leaving the top of the sleeve open.

I printed about 20 kids movie posters that were a little smaller than the sleeves (so that pages dropped in easily). Kids loved swapping the posters out to show what was playing in their theater.

Showtime Board

The last element of my Imagination Station was the “Showtimes” board. This included a collection of showtimes and movie titles (that matched the names on the movie posters) that kids could swap out on our department magnet board.

I love creating these pretend play areas, but this theme was definitely one of my favorites. The kids loved it, asking where the popcorn went months later.

One of my favorite stories was when a child took her dad into our homework help center (during the early afternoon, when it wasn’t in use), turned off the lights, and started the movie, which they “watched” together while eating popcorn in the dark space. Pretend play for the win!

Pokemon Party

There is nothing quite like the Pokemon fandom. Pokemon love spans all ages–from preschoolers to grown-ups. There is a huge Pokemon following at my library, and this year’s Pokemon Party was no exception, with 150 folks coming together to celebrate.

My unregistered fandom programs over the summer typically include three core elements: group trivia, group BINGO, and a variety of crafts and games that folks can participate in at anytime. The annual Pokemon Party involves a few additional items, including raffle/door prizes as well as a ton of snacks. I normally avoid food in programs, but at each Pokemon event, I have groups of kids who bring binders of trading cards and sit with other kids for the entire two hours. The snacks are meant for them but are available for everyone.

Looking for More Pokemon?

Check out how I made this program virtual with Pokémon Trivia, Pokémon BINGO, and Guess that Pokémon.

Pokemon Trivia & BINGO

Trivia and BINGO are optional for whoever wants to participate. Trivia is difficult intentionally, with prizes for the Pokemon trivia experts. Everyone who participates gets a sticker, but our top three trivia masters get to pick from some nicer themed prizes (in order from highest to lowest score).

The program outline and all trivia questions are in the below powerpoint. Download here.

BINGO is for everyone. We continue to play until everyone has gotten a BINGO. For many of our youngest players, this is their first ever BINGO game! When someone gets a BINGO, they bring their board to the front of the room and get to reach into a mystery bag filled with tiny Pokemon figurines. One prize-winning BINGO per person.

I got my BINGO boards free from The Eco Friendly Family, and using the extra boards provided, created enough boards to have 50 players at once.

3Doodlers & Button Makers

I use our library tech whenever possible, especially at fandom party programs. The 3Doodler pens made an appearance, with outlines of various Pokemon to trace (Pikachu was the favorite).

Our 2.25″ button maker was also available, with a teen volunteer helping kids make as many buttons as they would like.

Pokeball Ping Pong Balls

This is my third Pokemon event, and I am always on the hunt for new crafts. One of this year’s addition was ping pong balls with sharpies and pictures of Pokeballs. Kids could color their own Pokeballs, with clear rules that they couldn’t throw their new pokeballs during the program.

Trainer Toolbelts

Another new craft for this year was trainer toolbelts. I gave kids black strips of 12″x18″ paper, string to tie to the ends, and various cardstock pokeball designs they could color and cut out. “Pokeballs” could be taped or glued onto “pokebelts” and worn around the waist.

Guess the Pokemon

Guess the Pokemon is an annual favorite game. This year, I used 20 new Pokemon silhouettes. Kids had to identify the Pokemon’s name, check their answers, and pick up a small prize.

Pin the Tail on Pikachu

Exactly what it sounds like. Kids pinned the tail on Pikachu. This was also a return game from past events.

Catch the Pokemon

I wrapped pop cans in Pokemon character faces and colors. Kids threw a stuffed pokeball at the cans in an effort to “catch” the Pokemon by knocking the cans down.

Pokemon Scavenger Hunt

Each year, to advertise my Pokemon Party, I put a Pokemon scavenger hunt around the youth department, adapted from the one created by the Ontarian Librarian. This is always a huge hit, with a few hundred kids completing the scavenger hunt.

Innovation Academy: Tech Fair

After receiving a grant for some technology items two years ago, I’ve been running registered, monthly technology programs for upper elementary school kids (roughly ages 8-12).

These were great programs, except for a few recurring issues:

  • Each program focuses on one topic or device, and I have a limited number of devices, so a limited number of kids could attend (max. of 20, sometimes as few as 10).
  • This means that these programs had to be registered. Registration often filled up within 30 minutes of it opening (two weeks before the program date), even when I was offering 2-4 sessions in a month.
  • Each program, I have a new set of kids with different abilities. Some have coding skills well beyond my own; others have never heard the word “coding” before walking through the door. This made it hard to plan anything too advanced.
  • While programs were designed for ages 8-12, I often have parents sign up their 5-7-year-olds for my programs. While I am glad they are excited about tech, it makes it even more difficult to teach basic coding to a group of kids with mixed abilities when a few of them can’t even read yet.

This summer, I decided to try something different. Instead of offering weekly registered tech programming, I offered a monthly tech fair. I put out as much technology as could fit in our space and work with the number of tablets we own. I wasn’t sure what to expect with attendance or participation, but overall the programs were a success.

Tech Fair Content

During each month’s tech fair, I strategically planned out how the room was laid out to accommodate the most technology. Almost all of the technology we own was used at some point during the summer–it was a great bonus to see everything out of the cabinets and being used by the public.

Tech I used at least once over the three programs included:

Each technology item was at a different station with a loosely structured activity. As the sessions went on, I realized that structured activities really weren’t necessary. Kids explored the technology in deeper and more creative ways when they had the time to do that on their own without having to focus on specific steps in a task.

Family Engagement

An unexpected outcome of this program was the multi-generational experiences and learning that took place. During my monthly registered tech programs, sibling partners often worked together, but, with rare exceptions, adults stayed outside of the room.

Since the tech fair wasn’t structured in the same way, adults were welcomed into the tech space. Little siblings came too. Third graders showed grandparents how to build a video game with Bloxels. Parents explained to kids how Ozobots use sensors to read color patterns that tell them to complete certain actions. Five-year-olds who didn’t yet have the skills to use the Blocky app with Dash helped create an obstacle course, and an older sibling explained to them how their code worked.

Families walked out of the program with some hands on time with new technology after thinking creatively about ways to take a simple challenge or activity to a new level.

Tech fairs are simpler for me to plan than monthly programs. I am essentially pulling from our supply of tech, charging and pairing everything, and leaving the rest up to our patrons. Registration and age requirements are no longer issues. However, the simplicity in program planning is not why I want to repeat this series–the learning that came from family engagement made this series something to remember.

Steven Universe Color Party

This coming weekend Cartoon Network is showing every single Steven Universe episode ever, all leading up to the premiere of the new Steven Universe musical on Monday…so this feels like a great time to talk about my Steven Universe Color Party program!

Steven Universe
Steven Universe and the Crystal Gems (Pearl, Amethyst and Garnet).(Cartoon Network)

If you are unfamiliar with the TV show Steven Universe let me try and catch you up to speed, even though I will not be able to do the show justice at all. Let me start by saying that it is the most LGBQT+ cartoon you will ever watch, it is political, diverse, and even though the entire premise revolves around alien gem lifeforms with special fighting powers it is completely relatable.

The first season features a goofy kid named Steven and weird alien adventures that he goes on with his female warrior guardians, the Crystal Gems. Steven is learning to master his alien gem powers as he is half human and half gem. His lovable human dad is a bit of an oaf and the other unique and diverse characters in Beach City are all given decently explored back stories which we learn throughout the seasons.

Then season two drops and you get more back story on the Gems and you begin to think wow there is more to this show than just a fun alien saving rainbow world….then seasons three through five having you question how you were lulled into thinking this was anything but an epicly awesome, equality driven ode to love, diversity, rainbows, and truth.

Steven Universe shows human nature better than any TV show I have ever seen. It may be geared for kids, tweens, and teens, but it does not shy away from big issues or dumb down it’s content. It walks the line of having pop culture appeal and being topically relevant to society which is why I think so many of my kids gravitate towards it. And is why this summer we needed to have a fun, light hearted party to celebrate the alien space gem warriors.

I planned stations and activities based upon the Crystal Gems’s strengths where each attendee got to go through different “training” with each Gem and of course it had to be very colorful.

Pearl

Pearl is the mom figure of the group. She is always looking out for Steven’s best interest and trying to guide him through life. While she is a stickler for rules, Pearl understands that Steven learns in his own way and helps teach him skills he needs as a Crystal Gem, like bubbling.

image
(Cartoon Network)

For Pearl’s station we worked on our bubbling skills. I added various food coloring colors to bubble mix and had teens blow bubbles using the colored mixture at white paper. You can also place bubble mix in cups and use a straw to blow bubbles in the cup until the mixture overflows for more intense bubble shadows.

Garnet (Sapphire & Ruby)

(Alexbandria @Mrs_Motionless)
  

Garnet is actully a gem fusion. She is the combination of Ruby and Sapphire. So for her station teens got to play with my giant spin art machine* and fuse colors together.

Amethyst

Amethyst is a bit of a rebel in the group. She is the gem that pushes boundaries and speaks her mind bluntly. Amethyst also has a fun kid like streak to her perosnality. Since everything is very straight forward, upfront and fun with Amethyst we needed an activity that fit that criteria.

So instead of Steven Tag we played Rainbow Tag!

Rainbow tag is exactly like regular tag only all players are running around with handfuls of color run or Holi Festival powder*. The regular rules of the game still apply, but with a twist. One person is it and will chase other players in a designated area trying to tag someone, if they succeed the tagged individual becomes the next person that is it and the cycle continues. The twist is that instead of tagging someone by tapping them with a hand, Rainbow Tag lets you tag someone by throwing your handful of color powder at another player. The game ends when you run out of powders or out of energy to run around, whichever comes first.

Peridot & Lapis Lazuli

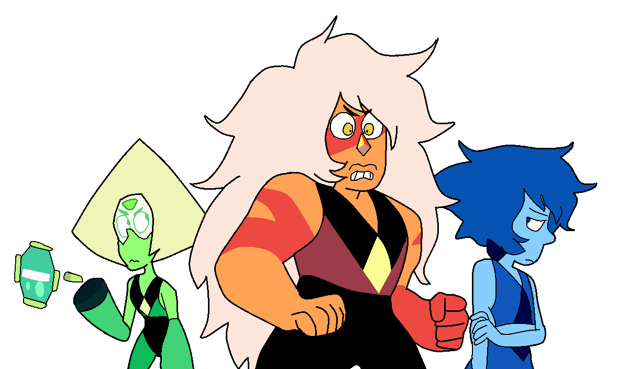
Peridot and Lapis Lazuli are newer members of the Crystal Gems. (Another member of the squad that could have been included in this activity is Jasper, but I had to cut her out of this area as my printer decided it was no longer going to print properly and was unable to have her repped during the program.) Peridot was a mathematical Home World Gem that was converted to the ideas of the Crystal Gems and began to fight to save humanity. Lapis Lazuli is a water based Gem that had been fractured during the first Gem War and was bubbled for safety reasons until freed by Steven. (The militant, Jasper was also a Home World Gem and had a longer redemption arc before joining the Crystal Gems.

File:Lapis Jasper Peridot sketch By Peri.png
Lapis Jasper Peridot sketch By Peri.png

This final station was all about accuracy, power, and water, which could only mean…..water balloons! Teens got to aim and throw water balloons filled with colored water at targets to improve their Crystal Gem fighting skills.

All in all we had an awesome time and there was a lot of very heated discussions about Crystal Gems and their character flaws while having fun with art!

*Giant spin art machine and DIY color run powder directions will be featured in next week’s blog post

Mother Bruce Storytime

Mother Bruce is one of my favorite book characters. If you haven’t read, or, even better, listened to, the book Mother Bruce by Ryan T. Higgins, track down a copy now. It is a funny read, perfect for preschool through first or second grade. The audiobook, read by Roberston Dean, is a particular favorite of mine with excellent pacing, great sound effects, and an original musical score that brings the grumpy old bear to life.

I was determined to celebrate one of my favorite storytime characters at the library. We had a great Saturday morning with a family storytime and a visit from Bruce himself!

My storytime outline is here.

We didn’t get through all of these activities (I often plan way too much). Goin’ on a Bear Hunt was a group favorite.

Mother Bruce Storytime Activities

After storytime, folks were welcome to participate in a variety of themed activities. These included:

Mother Bruce Ears & Gosling Craft

Visitors cut out bear ears and attached them to brown headbands. Optionally, they could also cut out yellow goslings to tape to a string hanging off the back of their headband (so your goslings would follow you everywhere, just like Bruce’s). Download here.

Goin’ On a Bear Hunt Obstacle Course

No preschool program is complete without some physical fun. Little ones explored our Goin’ On a Bear Hunt obstacle course. They completed some of the activities we did as a group during storytime including climbing a mountain, crossing a river, walking through a wheat field, and going into a cave to find our bear puppet.

Find the Goslings Scavenger Hunt

Ten goslings were hidden around our meeting room, and little ones had to find them all! When they found all ten geese, they got to pick a Mother Bruce bookmark. Download the scavenger hunt sheet here.

Download geese to hide around your room or library here.

Gosling Match

I love to give little ones an opportunity to play in water. Just like a fair game, little ones could pick up rubber “goslings” and try to find two with matching colored bottoms.

This didn’t work quite as planned, as my ducks shifted and didn’t want to stay bottoms down in the water.

Meet Bruce!

The star of the event–Bruce came to visit! After sufficient warning to prepare little ones for a visit from the big bear, Bruce stopped by for photos and to participate in the crafts and activities. The Costume Specialist store in Columbus, Ohio lets libraries borrow book character costumes for free, and these visits always make an exciting addition to any program.

Teen Volunteer Training

I am incredibly lucky to have a large base of teen volunteers to help at Westerville Public Library. Part of that is because of school requirements; high schoolers and middle schoolers have community service time as a graduation requirement in Westerville City School District. I also have many teens who are actively seeking scholarships or involved in extracurriculars that require or encourage helping out in the community that they live. All in all I have a little over 350 active teen volunteers every school year. The thing is, all of those teens need to be trained – so, each month, I run Teen Volunteer Training.

On the third Monday of each month, I can be found leading a one hour teen volunteer training session for ages 12-18. During the school year training covers how to help out at library programs and how to shelve materials in designated areas. Teens that attend training can begin selecting desired shifts and putting in some hours at the library for whatever their community service needs they have the very next day. (I really love how streamlined it has become.)

The training session is really simple. We lightly touch on the types of programs that teens can help at (storytimes, parties, special events, etc.) as well as special assignments that can become available throughout the year (making buttons, cutting out crafts, placing stickers, etc.). Because each program and librarian requesting the help is unique and the needs vary we do not spend a lot of time on this subject. However the basics of what is expected for helping at programs is covered, as well as talking about the general personalities; i.e. if you aren’t a fan of little kids….storytimes might not be your best fit. The WPL website also provides a link to a Google doc I maintain listing descriptions of more specific tasks that volunteers would be doing at each event.

The majority of the hour is focused on shelving training. Teens are able to help return materials in 3 locations: J Fiction, Teen Fiction, and DVDs. Spine labels and call numbers are explained, examples of different stickers that may be seen on books are shown, and then we get into the nitty gritty of the ABCs.

Like most fictions sections, our books are organized alphabetically by the author’s last name, then first name, then within that specific area the title of the book and/or series. I annoy my kids with several slides showing exactly what I mean by “author’s with the same last name” and that no matter how awesome you are about know series order they still go alphabetically. And then I up the ante and make them move and do things.

I start out getting groans and mumbles because I have us all sing the ABCs together and will stop or slow down if I don’t get participation from attendees. 

When teens show up at the beginning of the training I have the attendance sheet for sign-in* and everyone receives a beautiful paper with their last and first name on it. This paper comes into play after our lovely a capella, because it is actually their spine label featuring their very own call number. Each teenager is now a book and collectively they need to alphabetize themselves as if they are being placed on a shelf. 

Then comes the next physical movement and moment where teens will have to intereact with each other. Basket sorting! When setting up for the program I pull 10 items from each designated shelving area mix them up so they are out of alphabetical order and place each grouping in a basket for the trainees to sort and alphabetize while working together. Each team of teens will wind up sorting each basket of materials so that they can work with the items in a controlled environment. I, of course, throw some curve balls in the mix to make sure they all understand the order of author’s last name > author’s first name > title alphabetical system that we use and can correct any missteps along the way.

Then we get to do the super happy fun times tour and visit the areas where they get to shelve items! Starting in the Teen Dept. I show volunteers where to collect items needing to be shelved, where they get placed, and how to move book ends around. Most of the shelving in this area has bookends that are connected to the stacks and I teach them how to not only move the brackets back and forth along the track, but how to get them back in when they come out. Everyone get to “break a shelf” and practice moving the brackets and replacing them back properly.

DVD land is next with the same start as Teen, showing where to collect materials they get to re-shelve as service. Bonus time though because I sneak in one more round of alphabetizing training and have everyone select a DVD to shelve, let them loose in the stacks, and follow behind checking their placement to ensure we have it down. While they are winding through the stacks with DVDs in hand I remind them that shelving is not a race and that accuracy is key and what we are really looking for. If they need to sing the ABCs to themselves or take a minute to make sure it is being placed right, then do so. An item not in the correct location is as good as lost until it someone finds it.

After DVDs have been explored the last stop on the tour is the Youth Dept. We learn where materials to be shelved are located and have a look at the unique layout of the stacks in the area and I explain how to shift shelves. Because of our checkout rate and pages staying on top of things, very rarely do our volunteers need to know how to shift materials, however I’d rather have them armed with that knowledge than stumble across over packed shelves later.

At the end of the tour, we go over how to sign up for shifts using our system (which will be explained in a post on another day). And I implore them to please ask any questions and to make sure that they have things spelled correctly on the attendance sheet before I let them escape to the outside world armed with new knowledge, a pocket-sized handout on shelving basics, and my business card.

*Note: I try to keep registered programming to a minimum, however Teen Volunteer Training is one of those I do ask for sign-up. It helps me more easily check for applications and have the spine labels printed beforehand, as well as foreshadows IRL to the teens that they will need to sign up for things…like shifts. Teen Volunteer Training is also the one registered program that is the exception to the rule that only registered individuals can attend. I keep blank spine label forms in case I have kiddos wandering in to go through training so that they can be books too and we talk about responsibilities and signing up for things at the end of the training.

Play & Learn

This summer, I worked with a fellow librarian to start a nine-week play series for ages 0-3 and their families. Play & Learn quickly turned into one of my (and our patrons) favorite programs of the summer.

Each Wednesday, from 9:30-10:30 am, parents and their little ones interacted with 10-12 activities we placed around our large meeting room. On average, we had 80-120 visitors each week. People came and went on their own schedule–for some babies, 10 minutes was more than enough time in the crowded room; others enjoyed a full hour of play and even stayed to help with clean-up.

Some activities repeated each week (bubbles!), while others rotated in and out throughout the summer. We grouped our activities into four categories and made sure to have a mix of these each week:

  • Fine Motor
  • Gross Motor
  • Sensory
  • Belly Babies (for our littlest prewalkers)

We picked activities that kids of all developmental abilities could enjoy, such as ball pit balls in muffin tins.

Some of our most popular activities included:

  • Cereal Boxes and Straws
  • Baby Pool Play
  • Pom Pom Drop
  • Sensory Tiles
  • Tumbling Mats
  • Sensory Bags & Bottles
  • “Messy” Sensory Play (rice, beans, sand, easter grass, water)
  • Instrument/Sound Play

This program is particularly great because you can adapt it to whatever budget and space you have available. We have very large crowds in the summer, and this program was able to meet the needs of parents and little ones while appealing to a large range of ages. We included a mix of purchased play items and items that parents could re-create at home cheaply–another library could do a similar program just focusing on one of these categories, to save staff time (pre-purchased items) or money (cheap, home-made items).

Play & Learn also encouraged parent-child interaction. Each activity included laminated sheets on the floor nearby, explaining the value of the activity along with questions and vocabulary words to encourage parent engagement.

Play & Learn has already been requested multiple times by our community to be continued this fall. While that cannot happen, unfortunately, due to our busy school-year programming schedule, I am looking forward to this program’s return next summer.

Programming By a Thread

A long time ago, in a galaxy far, far away I embroidered as a hobby. And occasionally I will come up with the grand idea that I will once again take up this hobby, so I buy oodles of threads and embroidery flosses in anticipation of projects that I will undoubtedly create…..except the actual creating of embroidered objects does not happen.

This means that I’ve got stacks on stacks on stacks, floss on floss on floss and is good news for all of my teens because that makes string art is an easy possibility for a program!

String art is a crazy simple program to produce, all you need is:

  • Wood
  • Finishing nails
  • Hammers
  • Embroidery floss
  • Paint is optional
  • Templates are optional as well

You can always buy wood boards off of Amazon:

Or you can be like me and run to your favorite tool supply store, buy some wood planks and ask them to cut them to your desired lengths for a small fee. After all, you might already need to go there to pick up hammers and finishing nails and why not make it one trip. (Pro-tip: Home Depot and Lowes make the first two cuts for free on each board)

Overall teens are pretty good about waiting for their turn and sharing hammers, but you will need several hammers on hand. You can probably beg, borrow, or steal some from co-workers if you do not have a small cache of them. I currently have 8 hammers in my supply, but after the popularity of my last program for string art I will need to purchase a few more to cut down on the wait times between each teen needing them.

I like to supply some simple templates of patterns as well as blank paper and pencils for those that want to be unique and create their own designs. There are a bunch of templates all over Pinterest, but I have found that designs turn out best when you have nails spaced 1-3 inches apart, depending on the shape. That also means that you can never have enough finishing nails on hand. Whatever number you think each piece will take, double it and make sure you have at least 1 emergency pack squirreled away for use when you run out at the end of the program with a couple of teens still creating things.

I begin String Art by explaining what tools and supplies everyone will have access to and go over basic safety rules for using hammers and nails for everyone. A small stack of planks and a bowl of nails is placed in the center of each table grouping and 4-6 teens can easily sit at station with enough room for their projects.I put paints, tape, and template supplies at a table near the front of the room so everyone can have access to them and distribute hammers to the tables after the general rules and safety talk.

The entire program runs at the pace of the teen creators. Some will be faster than others, some will make more in depth pieces, some will focus painting the board and mapping out their outline, while others will just jump right in and start hammering away like they are wielding Mjölnir. There is no right or wrong way for them to create and as you can see a lot of different creations come out of it.

Imagination Station: Mission Control

Westerville Library’s youth department includes a pretend play area–our Imagination Station. Each month, a different youth librarian picks a theme and plans a play area designed for ages 3-6.

There are no strict guidelines for this space, but generally we try to:

  • Pick a theme that appeals to children
  • Keep all activities safe for all ages
  • Make clean-up and maintenance manageable for staff
  • Create materials and activities that are durable
  • Incorporate early literacy activities

In June 2019, I took over the Imagination Station, connecting it to our Summer Reading theme, Read and Blast Off.

Explore another Imagination Station – Movie Theater themed – in this post.

Pretend Play: Mission Control

The star of the space themed Imagination Station was our mission control board. I can’t provide much information on how this board was made–our amazing maintenance team took this project on.

Underneath the panel, a battery was attached with some wiring that made the lights turn on and numbers to change when kids flipped the switches. The best feature? The two phones actually talked to one another–if you held one phone to your ear, you could hear a person whispering into the other phone. So cool!

In addition to the amazing mission control board, we provided some simple dress up clothes to encourage pretend play. These included:

One of my favorite pretend play items were the jetpacks. These were not the most durable items. I had to remake an entire set halfway through the month. There are many instructions for these on Pinterest, but my steps are outlined below.

How to Make Jetpacks:

Materials (per jetpack):

  • 2 2-Liter Bottles (empty, without lids)
  • Thick Cardboard
  • Silver spray Paint
  • 2″ Thick Silver Ribbon
  • Silver Duct Tape
  • Hot Glue
  • Orange, Yellow, or Red Felt

Steps:

  • Cut cardboard so it is a little wider than the two pop bottles pressed together and just shorter than the height of the bottles.
  • Use spray paint to paint 2-Liter bottles and thick cardboard piece silver on all sides. Wait to dry.
  • Measure the silver ribbon to 18-24″ long. Use duct tape to secure to one side of the cardboard, creating a loop for a child to fit their arm. Repeat to create a second arm strap.
  • Flip the cardboard over and tape the two pop bottles to it. The more tape used here, the better. Wrap tape around all sides of the cardboard and use multiple layers, especially if the jetpack will receive a lot of use.
  • Cut felt to form flame shapes with a very narrow tip at the opposite end from the flames.
  • Squirt hot glue into the end of pop bottle and attach the flame pieces.

We also included a pretend play rocket tent for kids to explore.

Fine Motor Skills: Rocket Building

We purchased an additional pack of magnetiles to add to our regular storytime play collection. Kids built elaborate rockets and structures out of them.

Letter Recognition: Mission Codes

To incorporate early literacy, I created a mission codes matching activity. Kids had a bin of capital letters to sort through. They slid the capital letters into the 5″ x 7″ page protectors underneath the matching lowercase letters. The space words changed each week.

Writing: Trace Paths & Checklists

We included blank flight plan tracing sheets (from this Teachers Pay Teachers pack) to help build fine motor skills.

Flop: Moon Rock Exploration

I was really looking forward to this activity. Kids were supposed to explore tin foil balls–“moon rocks”–of different sizes with a magnifying glass, magnet, tweezers, and more. Instead, kids managed to rip off the gloves (which were hot glued, rubber banded, and sealed with shipping tape, plus duct tape later), take the foil balls out of the box, and pull them into tiny pieces.

This box didn’t last a full week–and we confirmed that nothing is kid proof.

Teen Advisory Board

Lots of libraries have advisory boards for their teenagers. A place where teens can voice their opinions, ask for materials and programs, and meet peeps from different schools (or even homeschoolers). When I became the Teen Librarian at Westerville, I inherited two: Junior Teen Advisory Board (JTAB) for middle schoolers and Teen Advisory Board (TAB) for High Schoolers.

At my previous library, at the advice and mentoring of my director, I tried to create a Teen Advisory Group. It somehow devolved from a group that met to help brainstorm, create, and inspire programming to being just another program I had to continually create new material for. Over the course of one semester it changed from being TAG: Teen Advisory Group to TAG: Teen Arts and Games, a hangout group that focused on activities and crafts.

It could have been the intense, once a week, schedule I was asked to implement for meetings. It could have been that I was a newly minted librarian and I was still testing the waters on what my program style was. The giant learning curve figuring out my new community coming from Chicagoland to western Kentucky. Or that no one knew what was going to happen with teen programming as I was literally the first Teen Librarian for Henderson Library and County. But somewhere along the way TAG changed and it was no longer an advisory group.

Arts & crafts and gaming programs are important and needed for teens, but that was not what I had prepped for. The new direction meant that I was quickly burning through all my programming ideas, that should have been spread over many months, and quickly burning out. During the small break in programming we had over winter break I was able to regroup and plan out some fun weekly activities without losing my mind but was never able to get a true advisory group off the ground.

And then I moved to Westerville, where there was already a Teen Advisory Board in place. And after acting as a substitute Teen Librarian during a maternity leave, I became the Teen Librarian…and wasn’t sure what to do with the advisory boards I inherited. After all my last foray into this type of programming fizzled out and turned into something completely different.

It was time for my new teens to school me, yo.

I was up front and honest about my experience with advisory groups to the JTAB and TABbers and asked how the program currently ran. Then we talked about what they wanted the group to be like. And over the course of one semester it changed from what I inherited to a hybrid of what my teens and I both wanted and needed.

Things that stayed the same:

  • When we meet – once a month on the last Thursday, for about an hour. JTAB at 6pm TAB at 7pm
  • Who it’s for – JTAB is for middle schoolers, TAB is for high schoolers
  • Service hours – as long as a teen signs in on the attendance sheet and participates in the meeting they get an hour of community service
  • Snacks – are served and enjoyed at the meetings, but can’t be taken home at the end
  • What we do – share wants for programming, library materials, and random conversations/ideas
  • Marketing – All members (including me) talk to teens in the community about coming to check out the fun we have at JTAB/TAB
  • Officers – TAB members elect officers for roles and more or less run the program with librarian guidance as needed
  • ARCs – anyone that attends can snag one ARCs to take home

Things that changed:

  • How to join – Show up! No more applying and interviewing, you show up you get to participate
  • Snacks – options are now a combo of healthy and sugary, but take into account shared allergies, religious dietary restrictions, and packaging (being able to save some snacks for the next meeting is a big plus!)
  • What we do – Create and run programs independently. Teens still help create programs and activities, but the onus of an entire program is no longer on their shoulders
  • Marketing – teens create special campaigns and activities to spread the word on the fun that we have at JTAB/TAB
  • ARCs Frenzy – anyone that attends can snag one or several ARCs to take home
  • Book reviews – JTAB and TABbers can fill out bookmark book reviews stating why they loved or hated a library book that gets tucked into it’s respective title

Small changes in how things went made a big difference for how we all view the advisory boards. Teens still get agency by sharing their ideas and wants, but don’t have the same pressures of having to be present all the time for everything. I don’t have have an overloaded schedule of crazy and have help in coming up with programs. And we all get snacks and hang time with people who’s lives may not cross paths if it weren’t for the library.